

So, you want to tidy up the cables of your PC case for better airflow and aesthetics. Here’s a step-by-step guide for the ultimate PC cable management.
Loose and dangling cables take the finesse out of a PC build. Nothing is worse than having an expensive, high-end PC that looks like an ordinary run-of-the-loose machine because of loose cables going everywhere.
Not to mention, unorganized cables also hamper airflow in the PC resulting in higher temperatures. Therefore, cable management is a necessary evil that you must do to ensure that your PC runs and looks its best.
Perhaps you might have been delaying the inevitable cable management process because it is complex and overwhelming. Don’t worry because this article contains a practical guide on how to manage PC case cables like a pro.
So, without further ado, let’s jump right into it.
What do you need for case cable management?
There are a couple of tools that can help immensely during cable management. These tools include,
1) Colored cable ties
The cable ties are used to clump the cables together, which would otherwise dangle inside the PC case. Having color-codded cable ties really helps in identifying cables to their respective components.

For instance, maybe you want to add another case fan. Having a color-codded cable tie for the fan cables will save a lot of time you would otherwise spend identifying the cluster for the fan cables.
2) Velcro straps
Cable ties are not useable in all spots around the case, so the velcro straps come in clutch. Hence, make sure to have some velcro straps on the hand, as you will need them quite often.

3) Cable Sleeves
Cable sleeves also serve a similar purpose of organizing the cables, but they are more used to tidy up the cables and make everything look uniform and neat. Avoid plastic cable sleeves because they are not bendable, hindering their ability to be reshaped in accordance with the case shape. Nylon braided cable sleeves are your best friend for cable management inside the PC case.

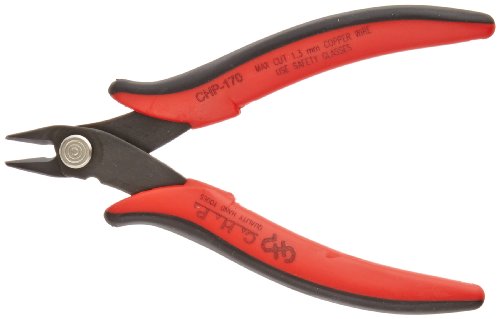
4) A small wire cutter
You will constantly need to clip the excess length of the cable tie and might as well need to shorten the cable sleeve in some situations. Therefore, to bring everything together, a wire cutter is a must.
Does a PC case really affect cable management?
Yes and no, depending on how far you want to push yourself to attain crisp and clean cable management inside a case. A cable management-friendly case like the NZXT H5 Flow or the Lian Li Lancool-215 comes with dedicated cable routing channels and rubber grommets for the cables to pass through. Hence, decreasing the effort it takes to manage cables makes the entire process quite straightforward.
Cable management and airflow go hand-in-hand. Typically, cases prioritizing cable management are also built around providing good airflow. Hence, you will also see the NZXT H5 Flow featured on some best PC cases for airflow roundups.

If you are starting a new PC build from scratch, I highly recommend getting a case with a good foundation for cable management. It doesn’t necessarily have to be the NZXT H5 Flow; any PC case touted with good cable management will suffice.
The Ultimate Guide to Cable Management for better airflow
With everything out of the way, let’s dive straight into the cable management guide. This guide is divided into multiple steps which you need to follow to get the best cable management for your PC case.
Step 1: Disconnect all the cables and start from Scratch
Setting a strong foundation is the key to good cable management. Sure, you could get away with managing already plugged-in cables and make the case better for airflow. However, the airflow gains will be marginal compared to if you start from scratch and rewire each component with proper cable management. As a result, if you are putting in the effort, why not go all the way into getting more satisfying and rewarding results.
We can divide all the cables in a PC case into three groups: motherboard cables, power supply cables, and front panel cables. Disconnect all the cables and pull them all toward the back of the motherboard.
At this stage, feel free to leave all the cables unorganized because, in the next steps, we will group these cables and organize them according to their connection type and location.
Step 2: Work on the front panel cables
Firstly, let’s work on the front panel cables and sort them out in the correct manner. All the front panel cables conveniently plug into the same generation location on the motherboard.
To start the cable management process, separate the front panel cables from the other case cables. Group the front panel cables into a cluster and shroud them in a cable sleeve. Tuck the cable sleeve along the edge of the case and secure it in place using a cable tie.
Now plug all the front panel cables into their respective headers on the motherboard. Use a motherboard manual to locate where the front panel cables connect. Once the cables are connected, put cable ties on any loose ends to attain a neat finish.

Step 3: Work on the power supply cables
In the next step, we will sort out the power supply cables. These include the 24-pin ATX power cable, 8-pin CPU, PCIe, and SATA cable. The SATA is a 15-pin cable that powers the Hard Drive and the SSD.
The 8-pin CPU connector is located at the top of the motherboard. Run the CPU to the top of the case by pinching it along the edge of the case. Use multiple cable ties as needed to make the CPU cable stick to the edge. Thread the CPU cable through the opening and connect it to the 8-pin connector on the motherboard.
Next, run the 24-pin ATX cable through the middle of the case. If your PC case comes with cable routing channels, utilize them. Ensure the cable is tucked behind the motherboard’s backing plate and not visible from the front. Route the cable through the opening next to the respective connector for the 24-pin ATX cable. Then tuck any excess cable underneath the hard drive caddy.
The PCIe GPU cable routes through the hole at the bottom of the motherboard. The length of most PCIe cables is larger than required, so tuck any excess cable underneath the hard drive caddy.
Lastly, plug the SATA cable into the hard drives or SSD. If you have an SSD and a Hard Drive installed in your PC, make sure to mount it on the backside of the case near the hard drive caddy. In this way, you can power both the SSD and the Hard Drive using a single SATA cable.
To finish this step, cable-tie all these cables near the hard drive caddy so they remain tucked in and away from sight.

Step 4: Work on the motherboard cables
The motherboard cables consist of a fan cable, AIO pump cable, RGB cable, and DATA cable for the SSD and the Hard Drive.
Locate the system fan headers on your motherboard using the user manual. They will be marked as “sys fan.” Insert the fan cable into its closest fan header on the motherboard. The RGB cables will also share a similar pattern, so while you are doing the fan cables, tidy up the RGB cables as well.
Since the fan and RGB cables are thin and flimsy, tuck them behind larger cables, such as the 24-pin ATX cable, so they don’t come loose.
After plugging in all the fan cables, group them in a cluster and secure them with a cable tie. Having all the fan cables clumped together makes diagnosing any issue related to fans quite easy and less time-consuming.
The AIO pump header is located next to the CPU socket on the motherboard. If your PC has an AIO cooler, route the cable through the same location as that of the 8-pin CPU header.

Step 5: Tidy up the front of the case
After putting so much effort into the backside of the case, it would be a shame if you left the front of the case with unorganized cables.
The cables that look messy on the front are the fan cables. Since these cables are thin and flimsy, they can easily pop up and become loose. To avoid that, tuck these cables between the little grooves in the motherboard. You can repeat this process for any other cable that sticks out.
Step 6: Add the finishing touches
Most of the cable management part is done. Now you just need to refine the cable management and make it more presentable and better for airflow. Firstly, use cable ties to tighten any loose wires. After all the wires are tight, clip off the end of the cable ties using the wire cutter.
The messiest part of the whole case will be the area around the power supply and the hard drive. Push the cables underneath the hard drive caddy and make sure they are not sticking out. To make them look ever cleaner and more organized, wrap a cable sleeve around them.
After everything is done, most of the cables should either be along the edges of the case or tucked underneath the hard drive caddy. The remaining cables will be along the center of the case and wrapped in a cable sleeve.

Benefits of case cable management
Once you are done with case cable management, here are all the benefits you can expect to enjoy.
1) Better Airflow
Properly organized cables liberate a lot of space in the PC case. There will be no loose or dangling cables. As a result, there will be unobstructed airflow around the PC case. Since a case with cable management has unrestricted airflow, you can run different fan configurations and airflow patterns to maximize airflow and reduce PC temperatures. This will not be possible in a case cluttered with cables.
2) Better Aesthetics
Cable management is the most effective way of enhancing the look of your PC. Not only will the PC look more organized and clean, but it will also look more sophisticated.
3) Ease of Troubleshoot
Troubleshooting becomes a breeze if the cables are properly managed with color-codded cable ties. For instance, let’s say a fan is not working. Well, you will be able to easily identify the fan cables and see if it is plugged in or not.
Without cable management, troubleshooting cables becomes a chore because of the mess that you have to unfold to get to the right cable.
4) Upgradeability
Having all the cables sorted and organized makes replacing PC components in and out of the case a breeze. With ease, you can locate the cable of the component that needs to be upgraded or replaced and disconnect it in no time and with minimal effort. This makes the entire process quite easy than having to scour through piles of tangled cables to get to the cable you want to disconnect.
Conclusion
Cable management is like a fine art, not for the faint-hearted. Getting the cables to look neat and organized takes time, effort, and commitment.
That being said, if you treat this task as a burden and try to rush through the cable management process, it will become gruesome, and you are highly likely to mess everything up.
So, take your time and let your creativity flow because, at the end of the day, there is no right or wrong way to manage cables in a PC case. Remember, it doesn’t matter how you get there as long you get there, and it holds very true for case cable management.
