

Released on ROBLOX in January 2020 by MiniToon and IK3As, Piggy is a super fun horror survival multiplayer game that grants its players a lot of freedom to build maps and structures in-game that can enhance the enjoyment you get out of it. Building animated water and lava is lots of fun on its own and a great way to get started with building your own objects in Piggy.
Animated water and lava can add depth and realism to your custom maps, making them more immersive and enjoyable. You could even have it serve as a visual cue to guide players through the maps or suggest the presence of hidden areas or objectives if you’re feeling like plotting!
It can also create a more challenging gameplay experience, as players that play on your maps must use their wits and quick reflexes to avoid the hazards you place in the form of the animated water and lava and try to keep their focus on their main objective of escaping from Piggy.
Without any further ado, let’s get right into it and set you up with your own animated water and lava using the frame-by-frame animation technique in Piggy!
Getting Comfortable with Build Mode
To build any custom structures or create maps, head to build mode first by clicking the “Build” option with the hammer icon on the main screen right after you fire up the game and then click the join your server button on the next screen.
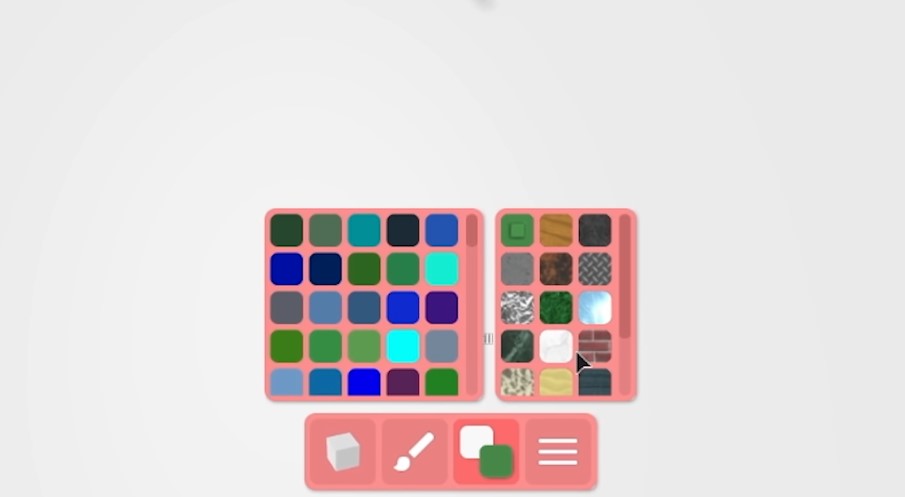
The basic concept of building blocks in build mode is relatively straightforward: you select a texture, a color, and a tool from the explorer window near the bottom of the screen, and you click anywhere to apply your choices. While there is a lot you can do in build mode, the more complex structures can get a little confusing to build and require a good grasp of the toolset. Fortunately for you, our guide is more than enough to get you your very own animated lava and water up and running in no time!
-
Build Mode in Roblox
We will be using the explorer to select whatever color we want our animated liquids to be, select an appropriate texture, and select and place different powered blocks. Don’t worry if you haven’t gotten comfortable playing around with these things on your own yet; just follow closely, and enjoy the heck out of the building process!
Building Animated Water and Lava
Water
-

Building Water
Choose a base for your water animation. While any surface works, just make sure that your base is flat and big enough, as your water body will be contained on this surface.
Head to the explorer window and start by picking your favorite shade of blue and a texture that mimics water waves; use it to build a primary water body and adjust the block to the required size by dragging the orange orbs around it. Next, place down a powered block on top of the normal water block, and extend it to cover the whole area of the water body.
Powered blocks will create the animation effect by switching between the textures of the powered and normal layer frame by frame. You can use any blocks that have a powered effect when activated, but for this case, you need the same color and texture as you used earlier for your water body.
-
Using the Looper
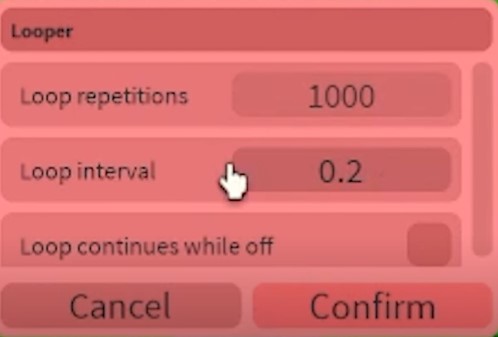
To make the frames loop and keep running, we connect a looper block to our powered block and set the loop repetitions to either a very high value for lots of loops, or “0”, in which case it loops indefinitely. The loop interval, which slows down the animation the higher it is, needs to be set to a low value, e.g., “0.1” or “0.2”. Setting it to a higher value might make our water appear dense and slimy because of the slower flow, but feel free to experiment and create all kinds of unique liquids once you’ve set everything up!
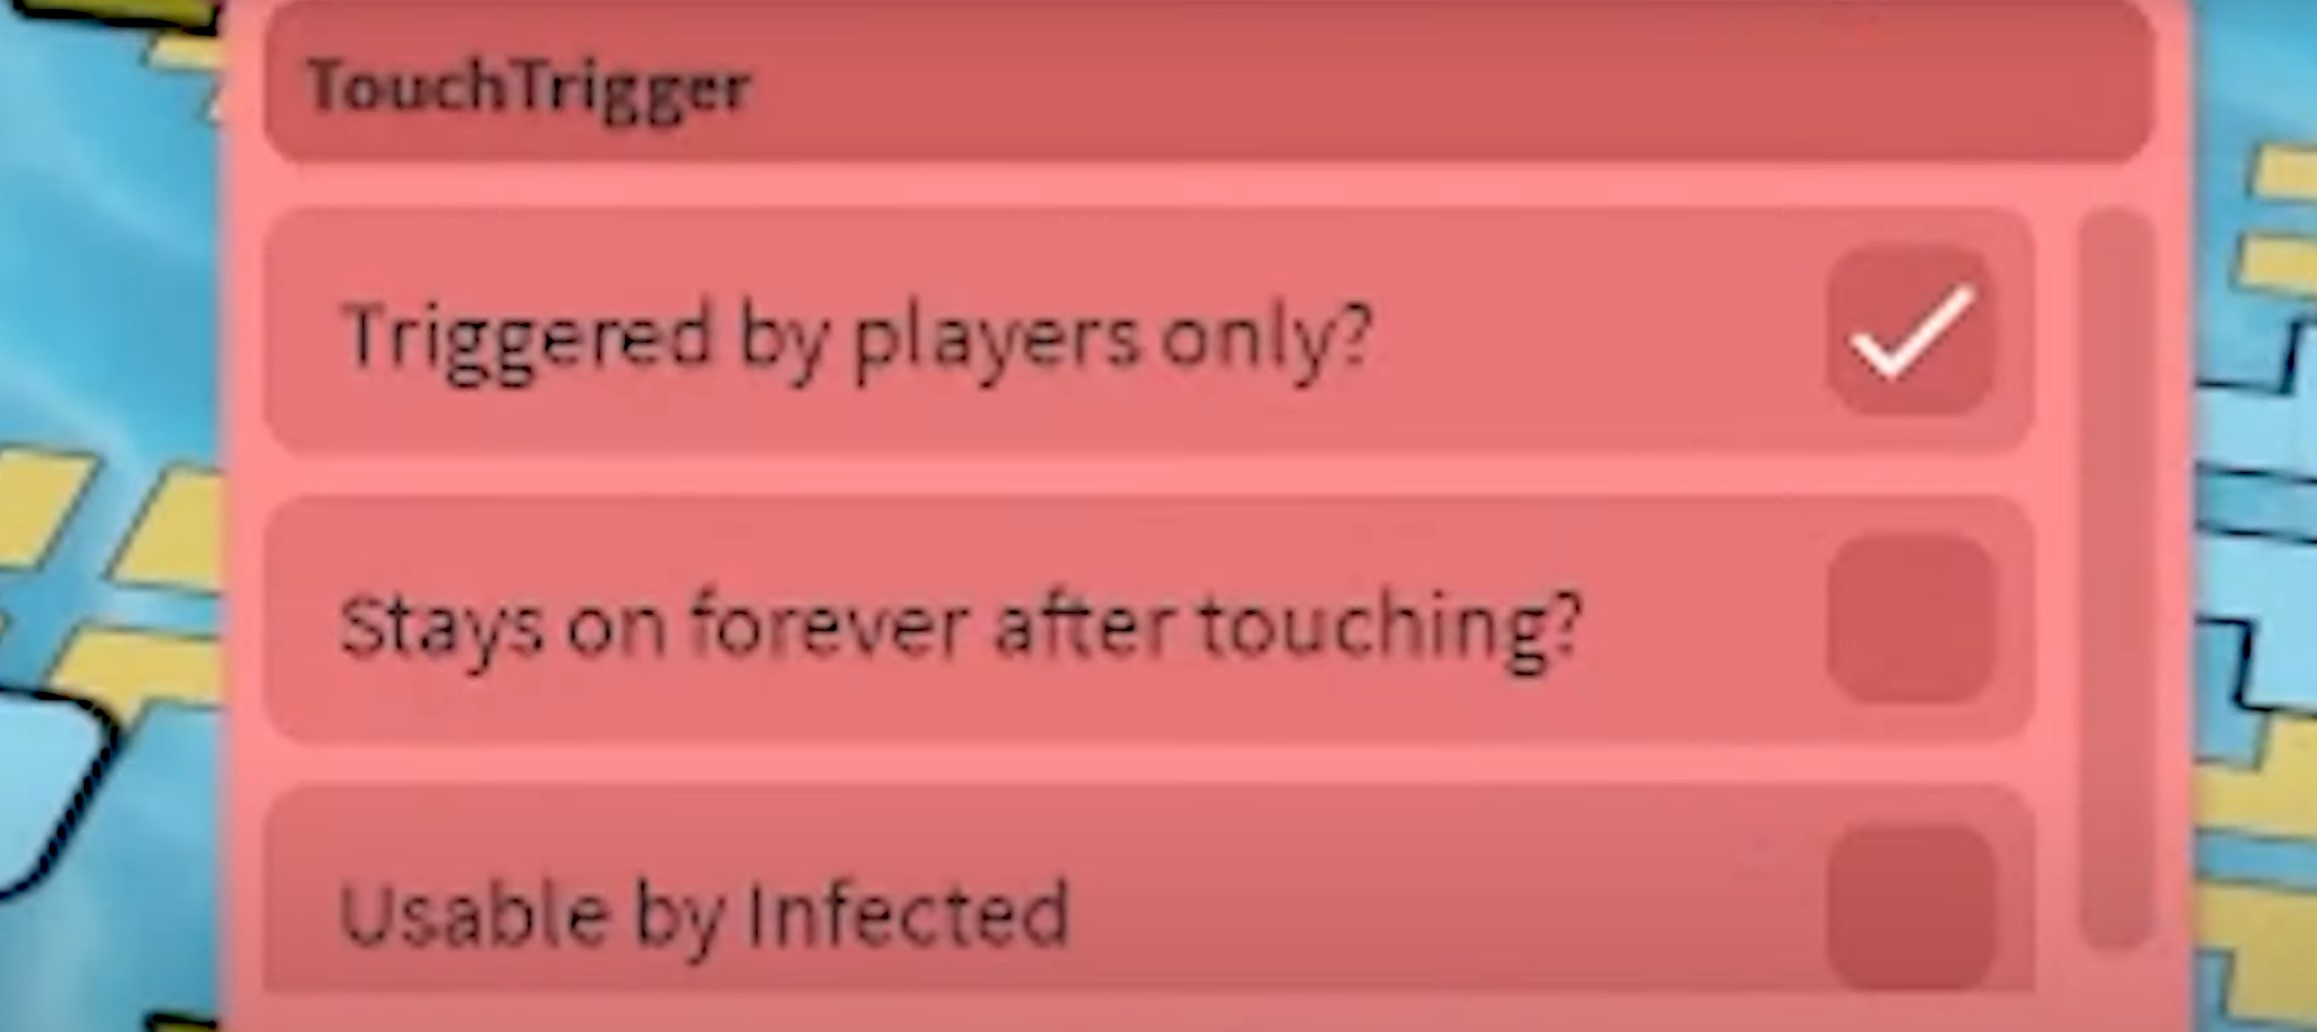
To auto-activate the looper each time, you can use a NOT gate on it. The NOT gate activates any looper if it is connected to a deactivated powered block: Just what we need to kickstart our animation! But it might still be a better idea to put a TouchTrigger on the players’ spawn location and connect it to the looper. This will not only trigger the looper and run the animation of the water as soon as the players are spawned in the map, but also help in other additions (such as sound) later. Remember to enable the “Stays on forever after touching” setting on the TouchTrigger.
Once your NOT gate is in place or your TouchTrigger is configured, move the powered block layer down by 1 block so that it is inside our first water body, and voila–You have set up your very own animated water! But it still feels lacking.
-
The Sound ID
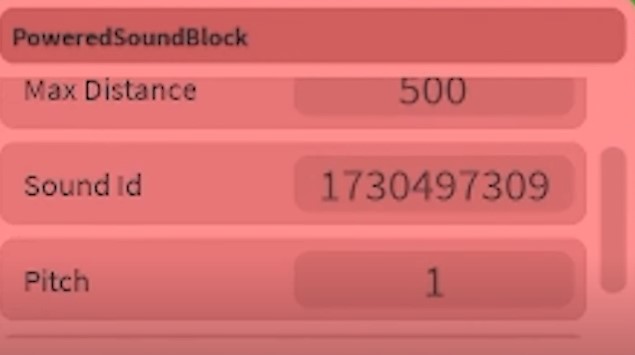
Moving water on its own won’t be as realistic, so let’s finish it up by giving it some therapeutic water-flowing sounds! For that, place a sound block on your powered water block and connect this to the TouchTrigger. Next, go to the sound block’s settings and set the sound ID to “1730497309” and the pitch to “1”. We recommend setting the volume to “1” and the max distance to “500” but these are two settings you can experiment around with to see what you like best.
And with that, your animated water is complete. Now we can get on to making a pool of molten lava.
Lava
-
Building Lava
Once you’ve decided on a base where you want to place your lava, select the red color and the lava texture with the orange cracks on it and use this combo to build the base and powered block layers just as with water.
Connect a looper to the powered block and use the same looper settings as with water except for loop interval, which we increase to between “0.8” and “1.0” this time around in order to slow down the animation and make it look closer to slow-flowing lava. If you don’t want to add sounds to your animation, you can put a NOT gate on your looper, and the animation will work. Otherwise, place a TouchTrigger on spawn and connect it to the looper and a sound block.
As with water, enable the “Stays on forever after touching” setting on the TouchTrigger, and set the pitch to “1” and sound ID to “3071563480” under the sound block’s settings. You can use a volume of “1” and a max distance of “500” in the sound block for a decent sound level. Move the powered lava block layer inside the base layer to complete the animation.
-
Stay on Forever After Touching
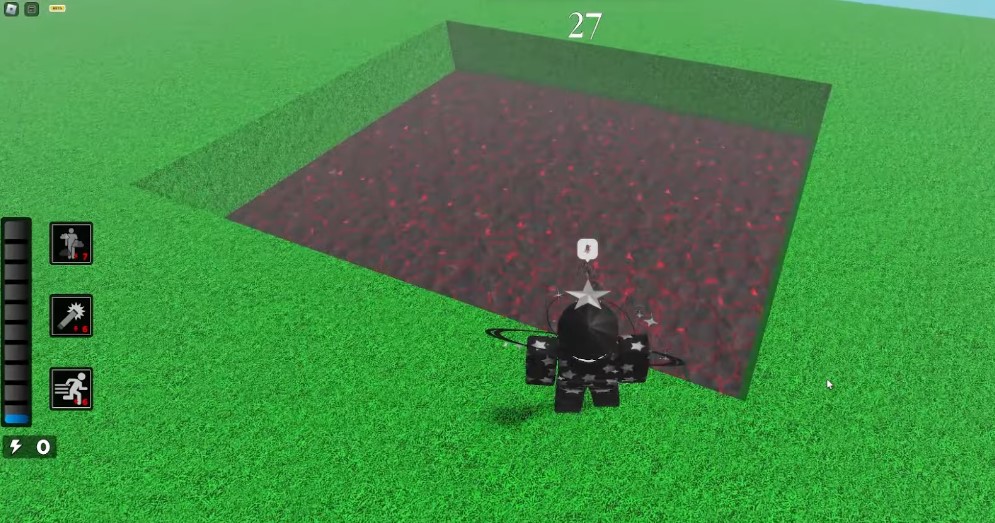
Lava still isn’t lava if it can’t kill you, so let’s finally turn our molten lava into deadly molten lava. For this, we will insert a death block layer halfway into the combined lava layer. To achieve this, place 1 death block on a slab instead of a regular block to make it travel a half-block distance on the y axis, and then remove the slab. The death block will now levitate at a half-block height. Extend this block to the size of the lava layer and place it halfway in it. Any player that dares to step into this lava now gets burnt to a crisp!
-
Placing a Light Block
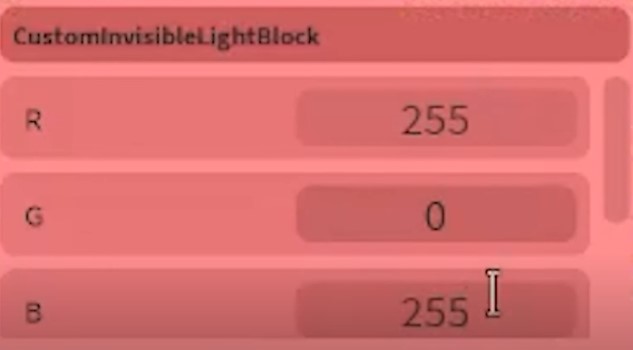
You can boost your lava with a fiery blazing effect by placing fire blocks just under the lava layer so that only the tip of the flame protrudes. Add as many fire blocks as it takes to cover the whole lava area, and you will be surprised by the results. You can also put red light blocks inside the lava layer to give it a glow or play around with other such blocks and make your lava pool prettier!
Keep on Experimenting
Building animated water and lava in Piggy is really fun and now that you know how to get your way around in build mode, we encourage you to keep trying new things and build your own structures. Don’t be afraid to think outside the box, not only can you make your own liquid pools of whatever you want, but you can also use the frame by frame animation and other methods to create waterfalls, fountains, and much much more!
We hope this guide inspired you to push your building skills and come up with something truly spectacular. Don’t forget to share your creations with the community in the comments below. If you’d like to see another guide on a more advanced build or have any feedback, don’t hesitate to reach out. Happy building!
